Create and Manage Assemblies
- Conk Buckley
Adding model elements to an assembly is straightforward. Select an existing or new assembly, select elements from the model, and then add the elements to the assembly. Once added to an assembly, they will display on the Assemblies page. Parts can only be added to one assembly but can be added to multiple packages. STRATUS will give a warning/question if the part already resides in a different assembly.
Assembly Management
Create Assembly
A STRATUS assembly can be created:
- During the model publish process when an assembly had been created in the model and where within STRATUS under Admin > Company > Settings > the Assembly Conflict Resolution for Revit or AutoCAD is set to AutoCAD is always right, Revit is always right, or Prompt User and AutoCAD or Revit is selected. See the Settings (Admin) for more information.
- Under Models > Viewer > Actions > Assemblies
- Under Packages > Viewer > Actions > Assemblies
In the latter 2 cases, the Actions > Assemblies feature displays and functions the same and there is a manual and Auto Assemblies option. Most companies create assemblies after creating packages.
Note: Before an assembly is created, deleted, or edited check that the assembly, package or the targeted parts in the model are in a Can Assemble Tracking Status. See the Tracking Statuses (Admin) article for more information.
To create a new assembly using the Actions > Assemblies feature:
- In the Models or Packages Viewer select Actions > Assemblies. The Assemblies dialog will display.
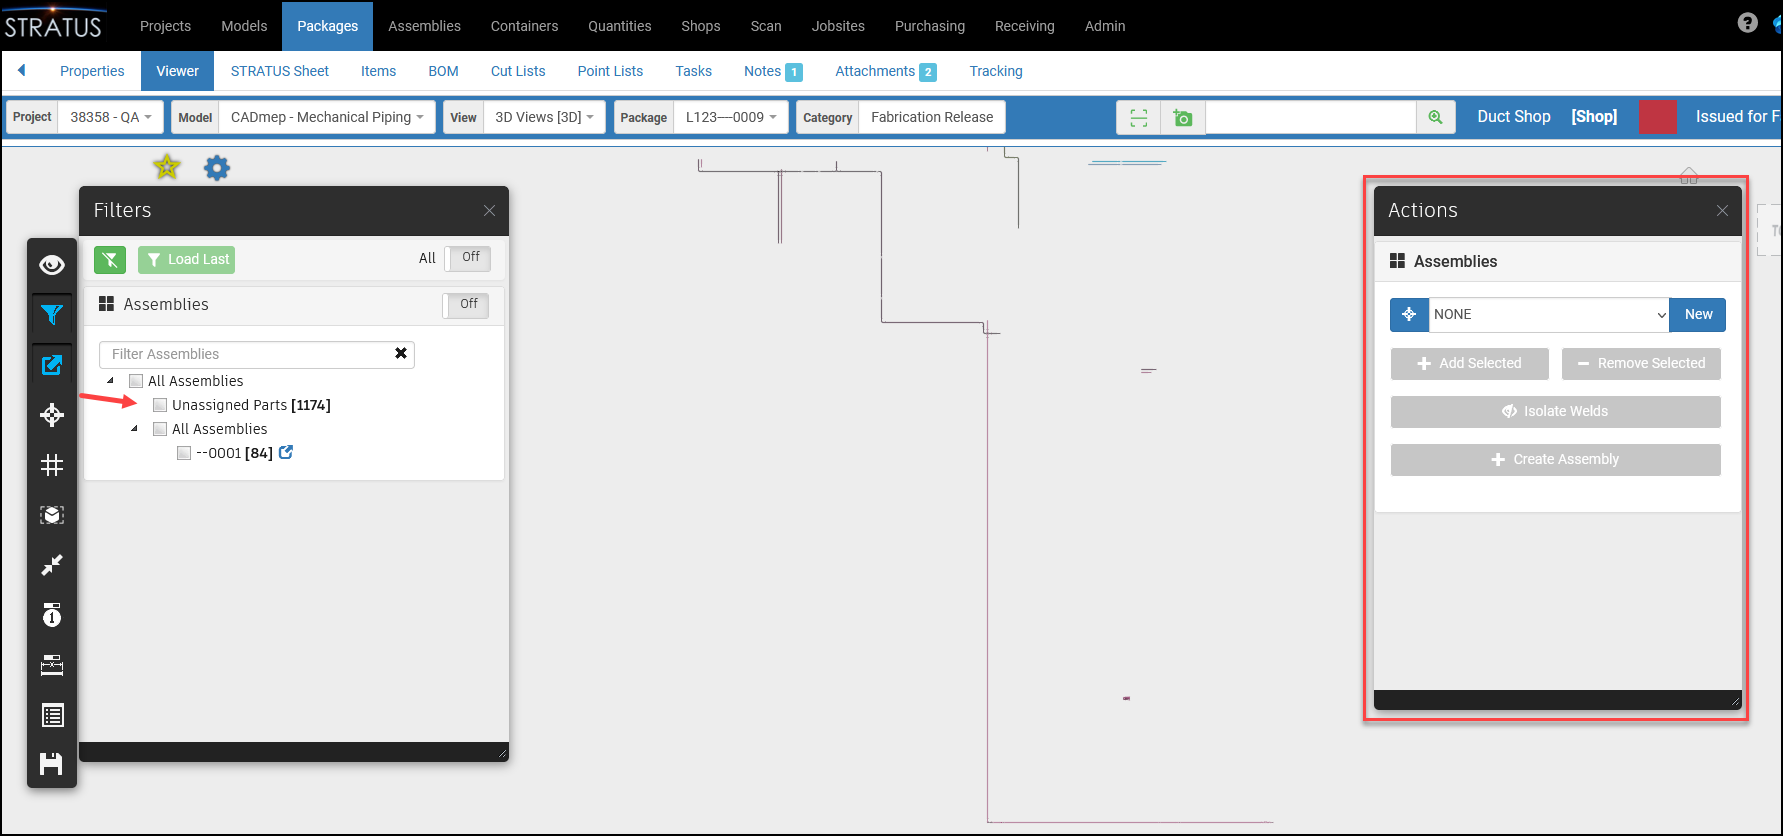
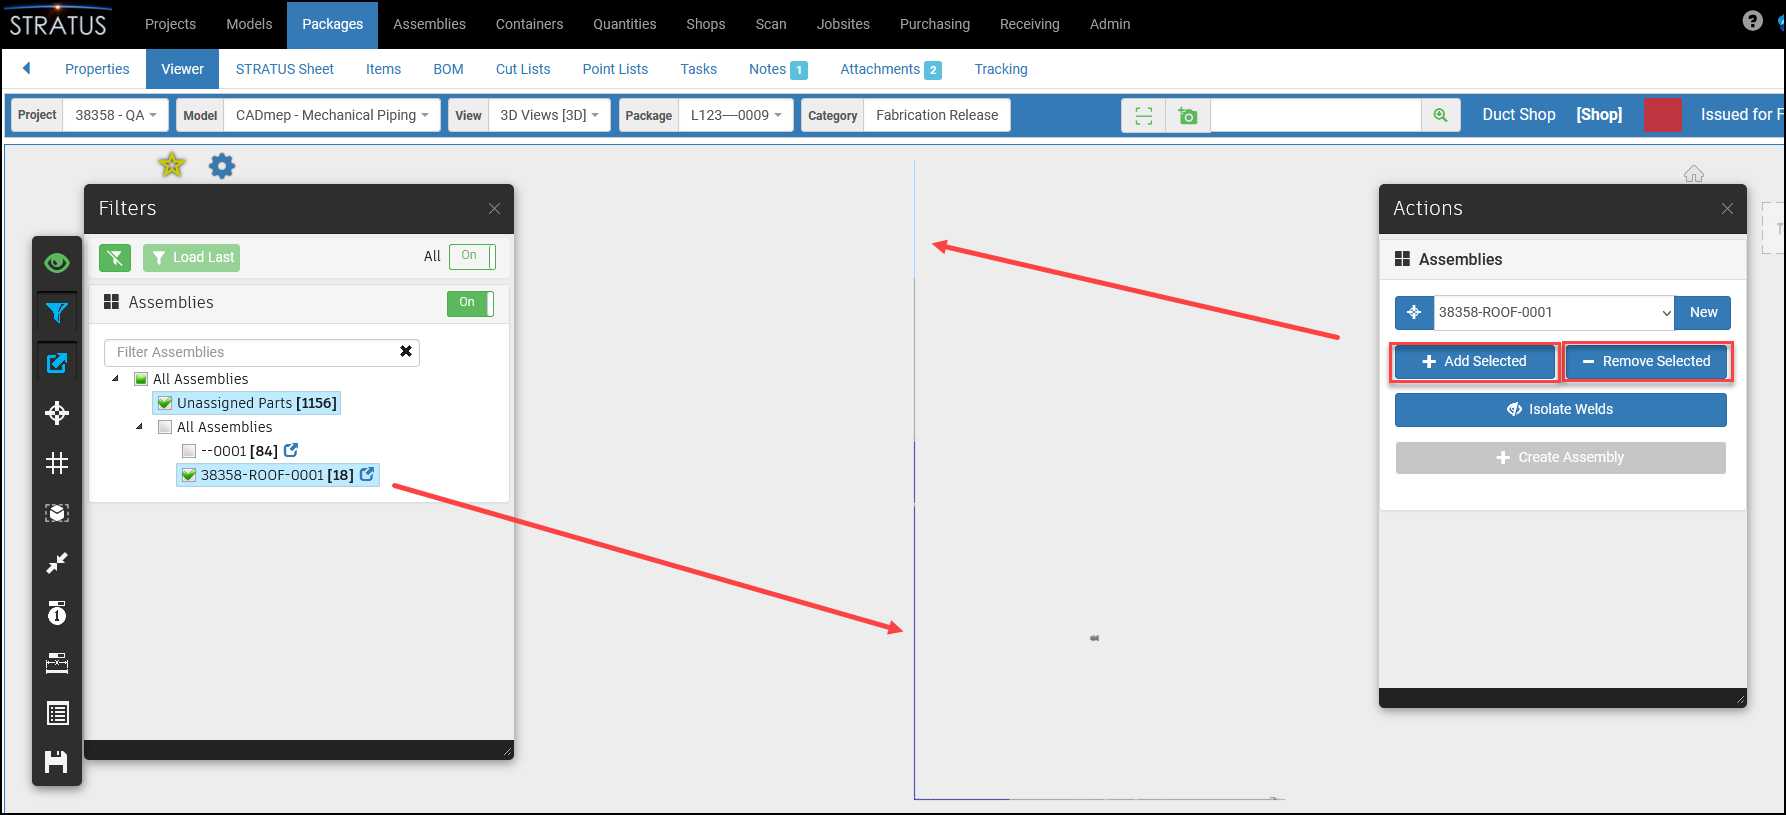
- Optionally, under Filters > Assemblies, click the Unassigned Parts checkbox to help identify which parts are not yet in an assembly. The parts in the viewer will be filtered.
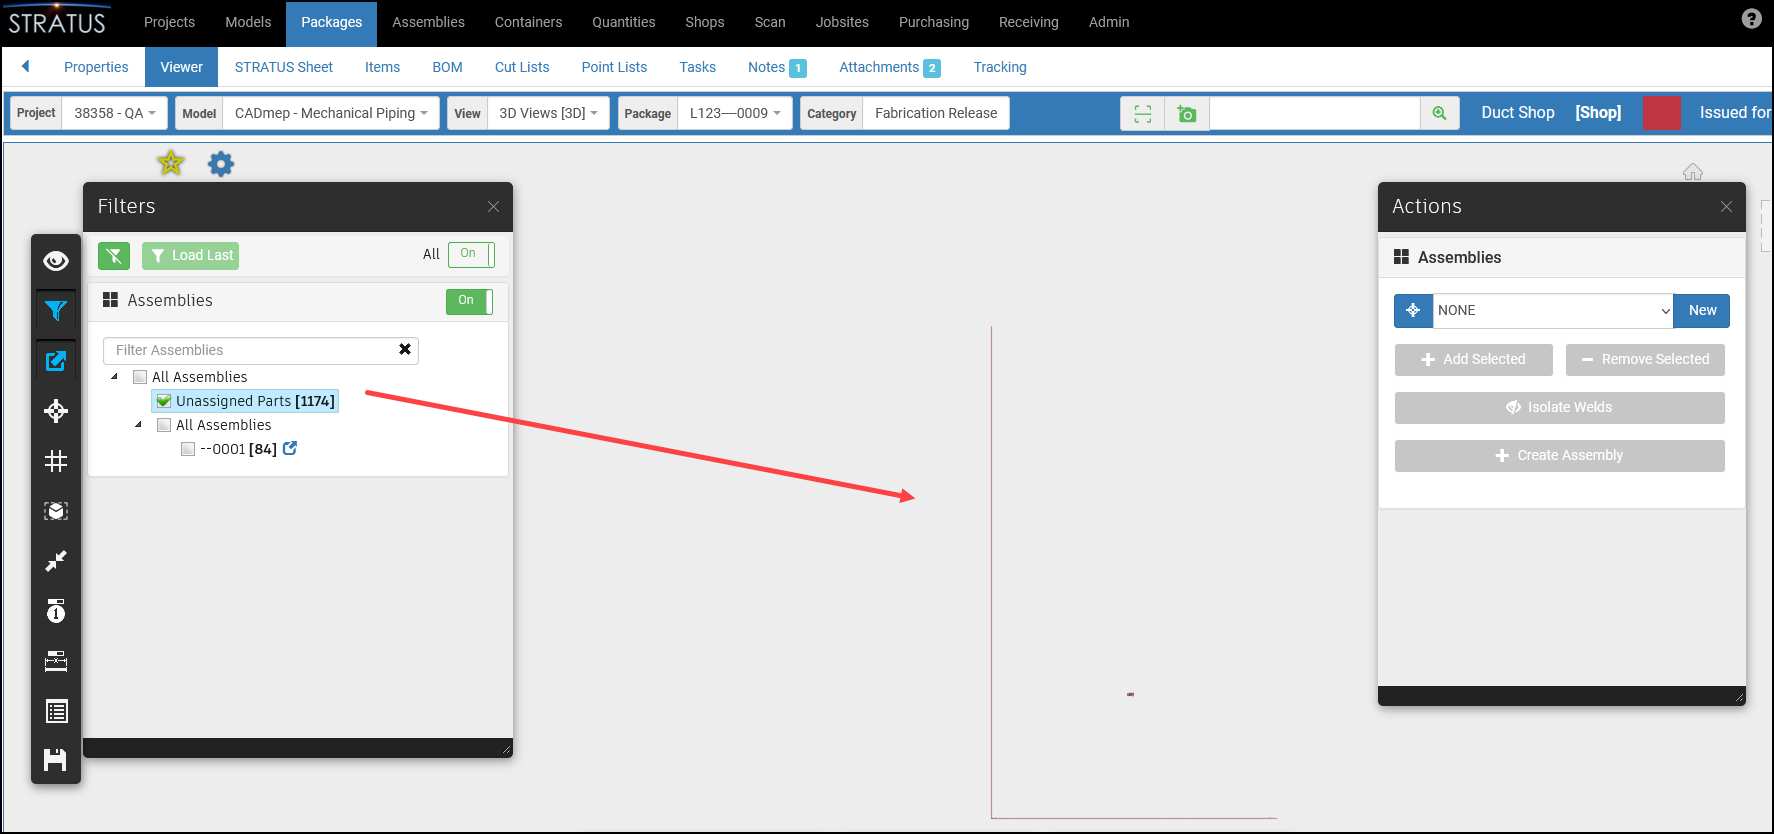
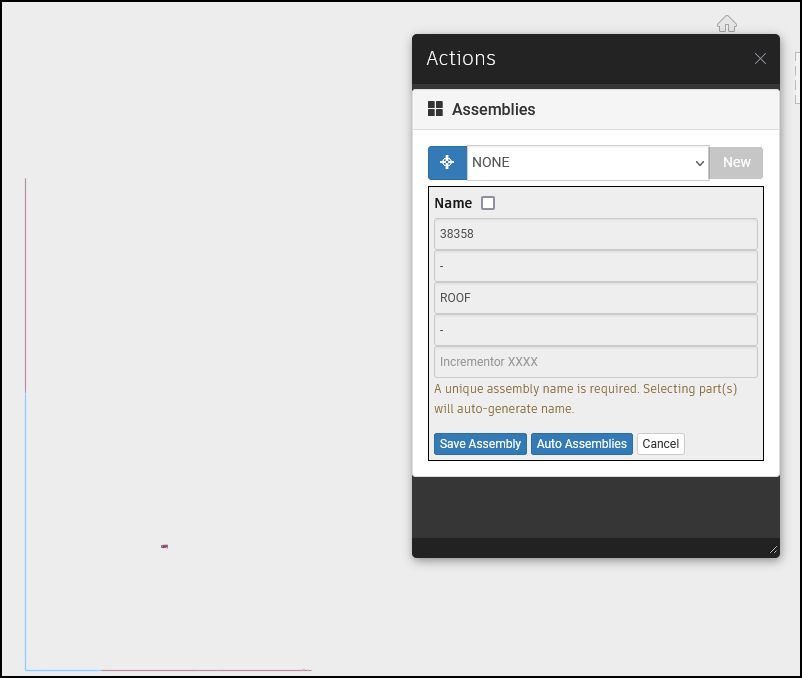
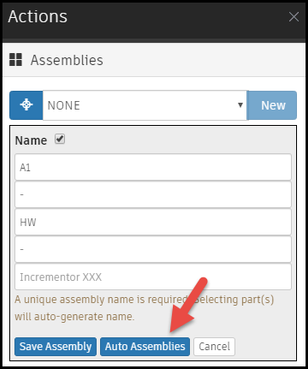
- Select the parts to be added to the new assembly and then click New, or vice versa. The Assembly naming fields configured under Admin > Company > Naming and Numbering > Naming Conventions > Assembly Naming will display and populate based on the parts selected. See the Naming and Numbering (Admin) article for more information.
- Name - To override any of the naming fields, click the Name checkbox.
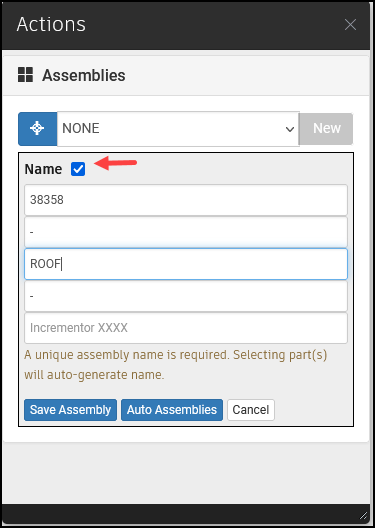
- Name - To override any of the naming fields, click the Name checkbox.
- When done, click Save Assembly button. The following displays:
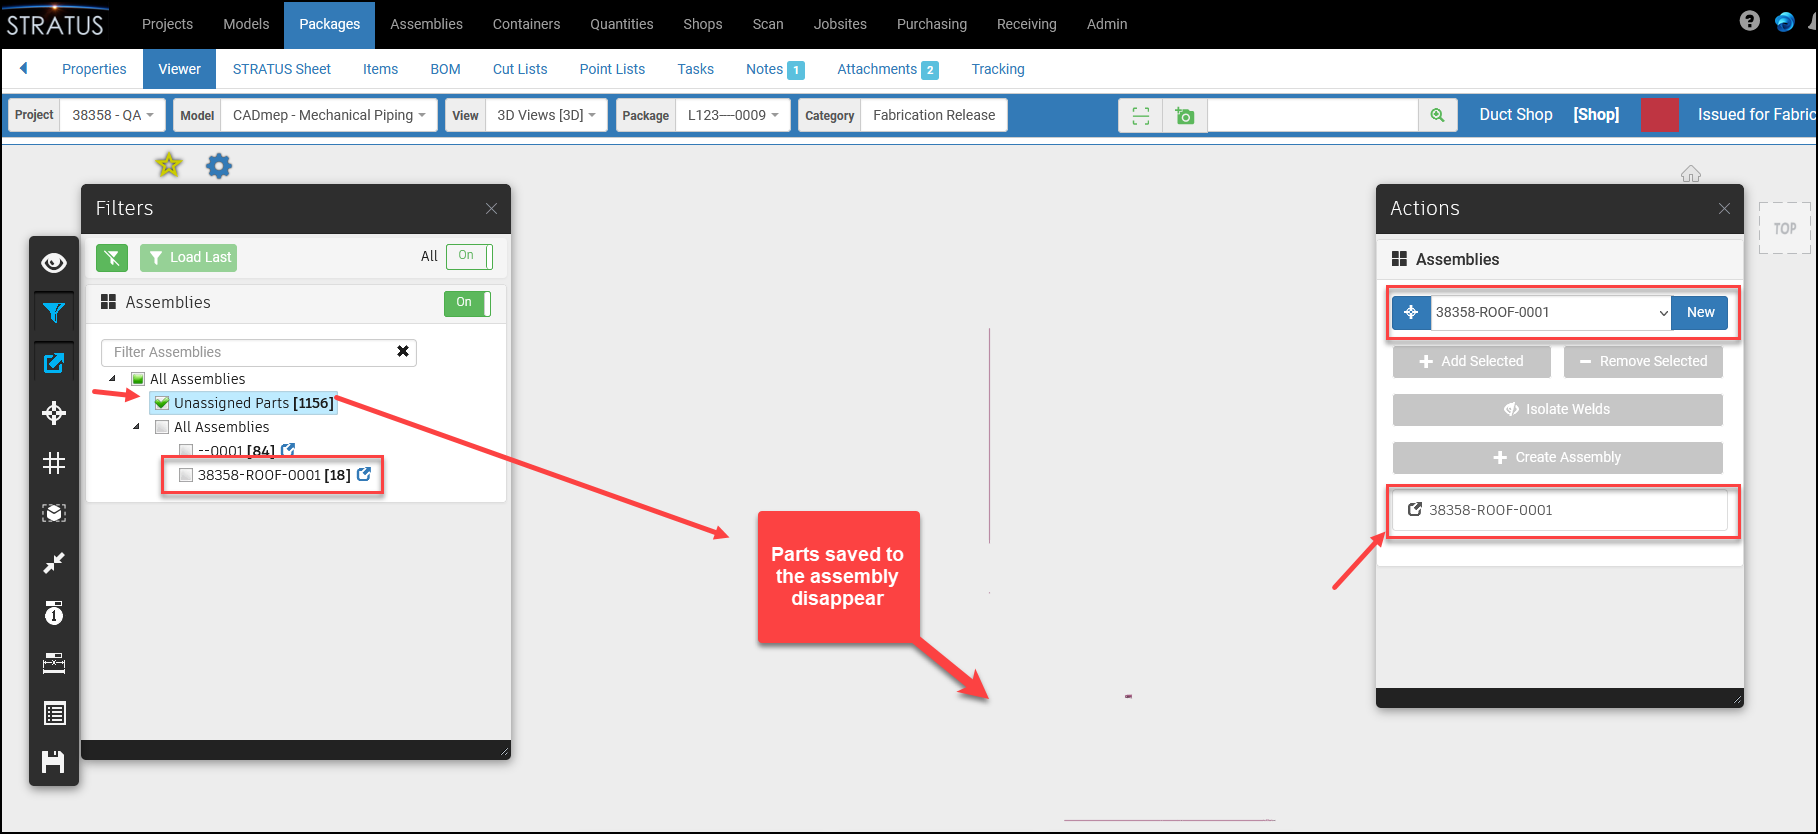
- The Assembly is created and its name displays in the Actions panel and in the Filters panel.
- In the Actions panel, the assembly name is also a link to open the assembly in the Assemblies Viewer. See the Assemblies Viewer article for more information.
- If the Unassigned Parts checkbox is checked, the parts will have disappeared from the viewer.
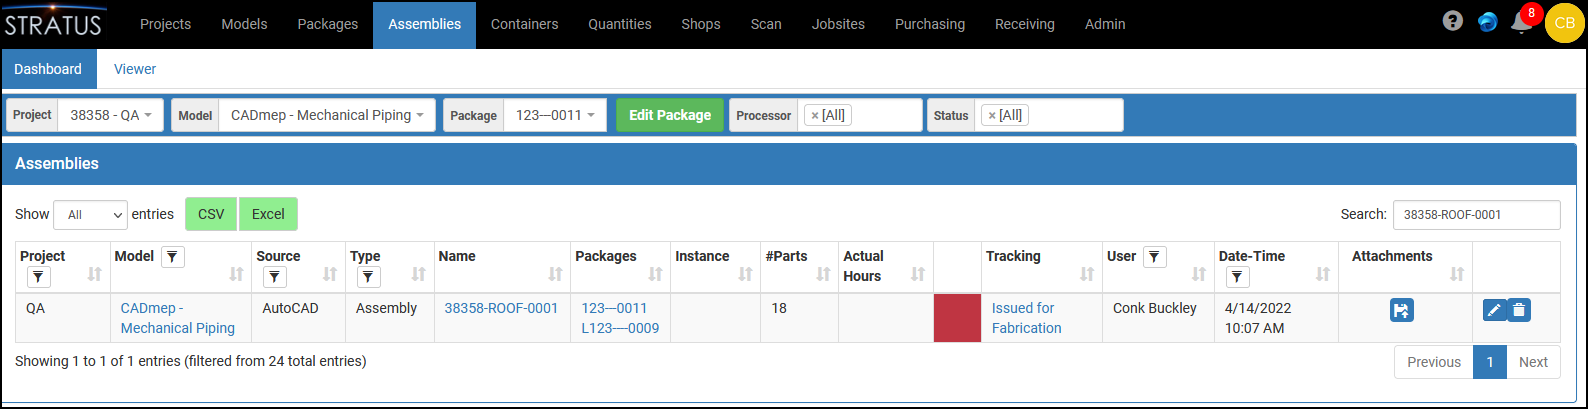
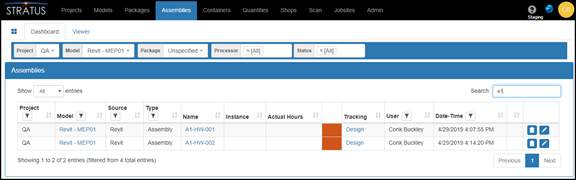
- The assembly displays on the Assemblies Dashboard.
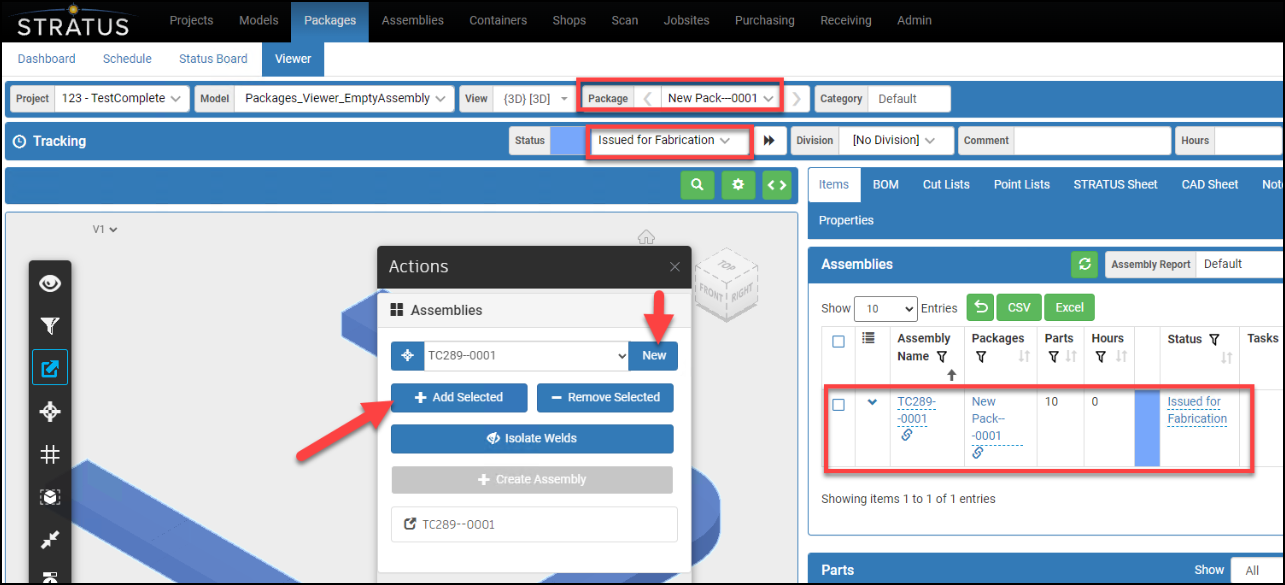
- Note : When creating an EMPTY assembly in the Packages Viewer, the assembly takes on the status of the Package/Parts being added.
Delete Assembly
A STRATUS assembly can be deleted:
- During the model publish process where an assembly has been deleted in the model and where within STRATUS under Admin > Company > Settings > the Assembly Conflict Resolution for Revit or AutoCAD is set to AutoCAD is always right, Revit is always right, or Prompt User and AutoCAD or Revit is selected. See the Settings (Admin) for more information.
- Under Assemblies > Dashboard - See the Assemblies Dashboard article for more information.
- Under Packages > Items - See the Package Items article for more information.
Note: Before an assembly is created, deleted, or edited check that the assembly, package or the targeted parts in the model are in a Can Assemble Tracking Status. See the Tracking Statuses (Admin) article for more information.
Add / Remove Assembly Parts
Assembly parts can be added and removed:
- During the model publish process when an assembly had been edited in the model and where within STRATUS under Admin > Company > Settings > the Assembly Conflict Resolution for Revit or AutoCAD is set to AutoCAD is always right, Revit is always right, or Prompt User and AutoCAD or Revit is selected. See the Settings (Admin) for more information.
- Under Packages > Viewer > Actions > Assemblies
- Under Models > Viewer > Actions > Assemblies
In the latter 2 cases, the Actions > Assemblies feature displays and functions the same.
Packages > Viewer > Actions > Assemblies - Add / Remove parts for an existing assembly
- Open the package that contains the assembly in the Packages > Viewer.
- Locate the assembly.
- Optionally, open the Filters > Assemblies and check the target assembly checkbox.
- Optionally, open the Filters > Assemblies and check the Unassigned Parts checkbox.
- Select one or more parts to add/remove. In this example, a part to add has been selected. The Add Selected and Remove Selected buttons become enabled.
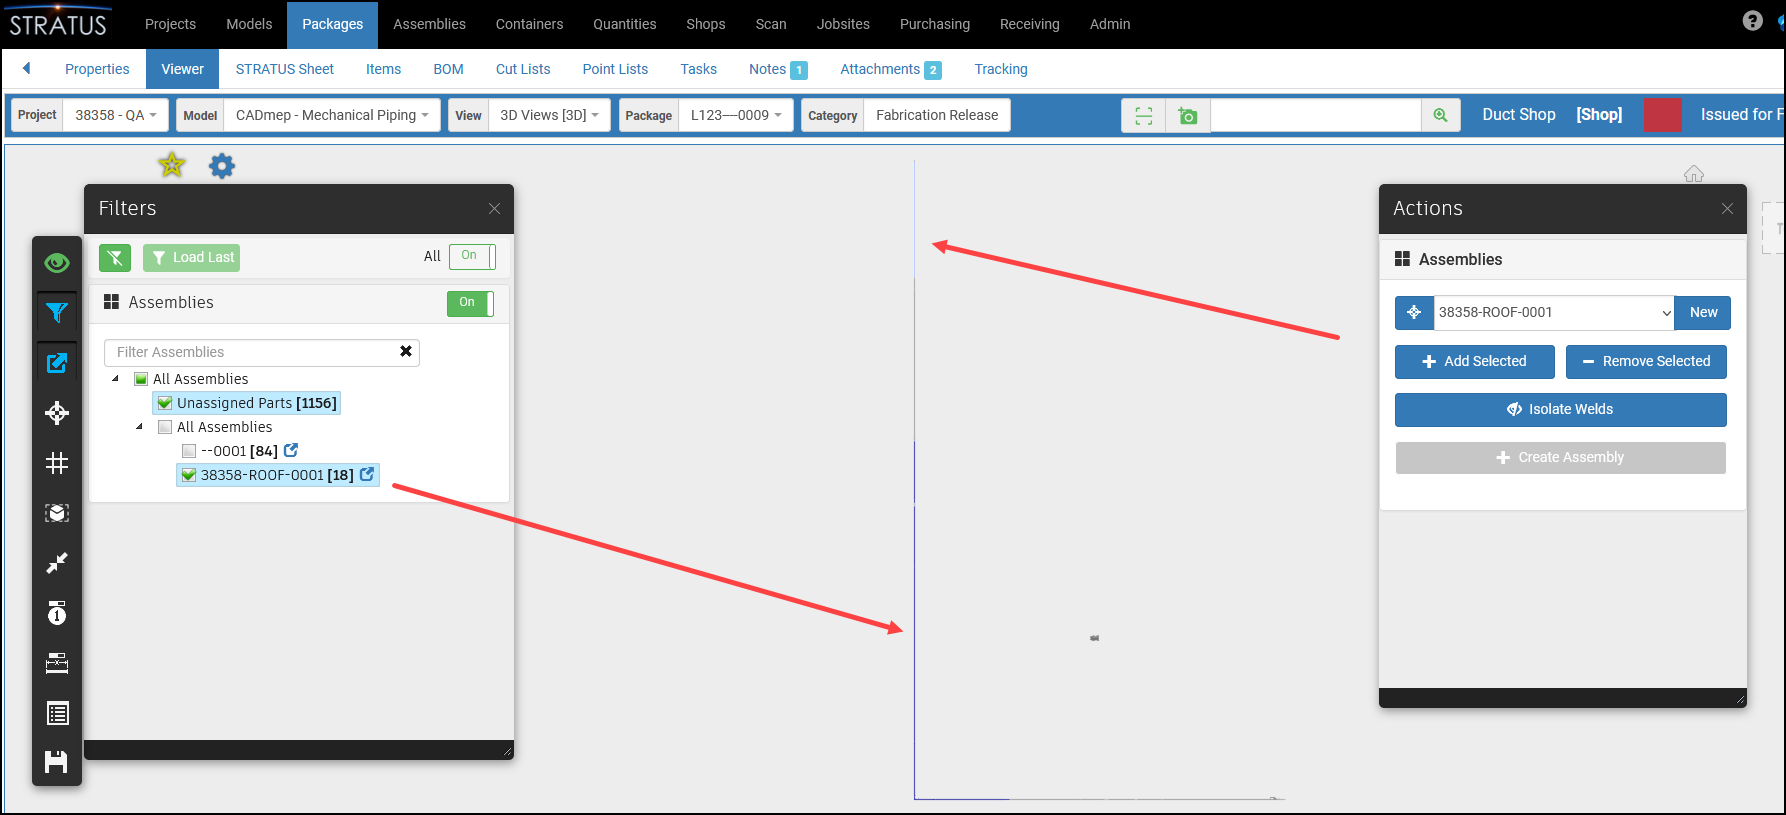
- Add - Click the Add Selected button. The parts will be added to the assembly.
- Remove - Click the Remove Selected button. The parts will be removed from the assembly.
Models > Viewer > Actions > Assemblies - Add / Remove parts for an existing assembly
Tips:
- Once an assembly is selected in the viewer, press the F key to zoom/focus onto the assembly.
- To select a part that is included in an assembly, hover over the part, press tab, and then click the left mouse to select the individual part.
- Open the Models > Viewer > Actions > Assemblies and use one of the following methods to select the assembly.
- Select the assembly in the drop-down under Actions > Assemblies.
- Select the assembly in the Models > Viewer.
- Open Filters > Assemblies, check the assembly, and then select the assembly in the Models > Viewer.
- To add one or more parts to the assembly, select the part(s) (not in the assembly) to be added to the assembly.
- Click the Add Selected button. The parts will be added to the assembly.
- To remove one or more parts from the assembly, select the part(s) (in the assembly).
- Click the Remove Selected button. The parts will be removed from the assembly.
Tracking Status for Newly Created Assembly
A newly created assembly will be assigned the first tracking status where the Applies to Assembly checkbox is checked. The parts in the assembly will be assigned the first tracking status in the list because parts can belong to multiple packages in different categories and customers have stated that they don't want the part status to immediately change.
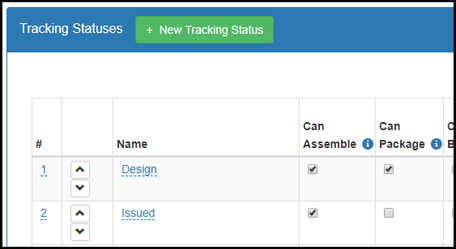
In this example:
- Under Admin > Company > Tracking Statuses, the first tracking status whose Applies to Assembly checkbox is checked is Issued.
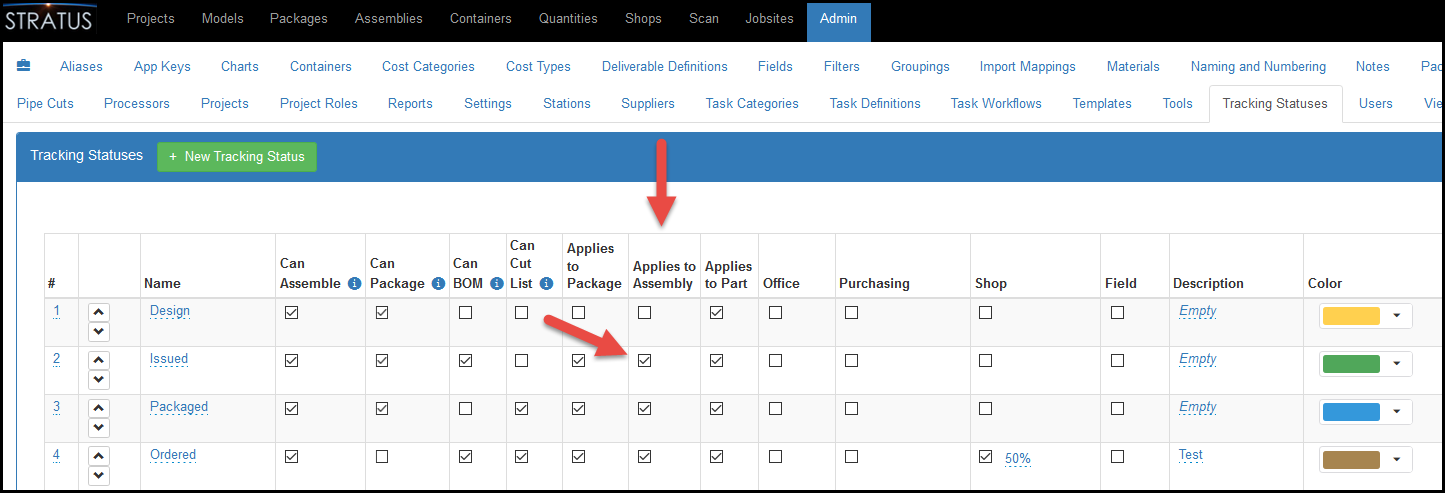
- As a result, when a new assembly is created:
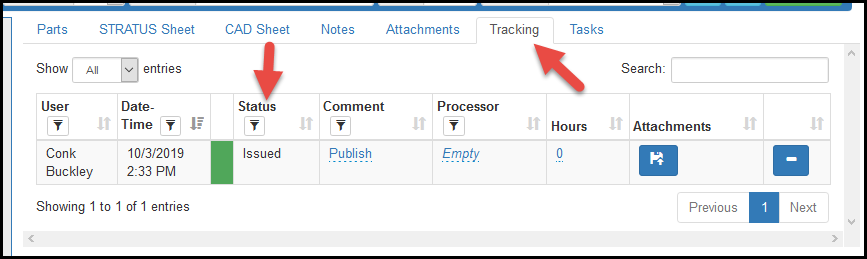
- The assembly tracking status will be Issued.
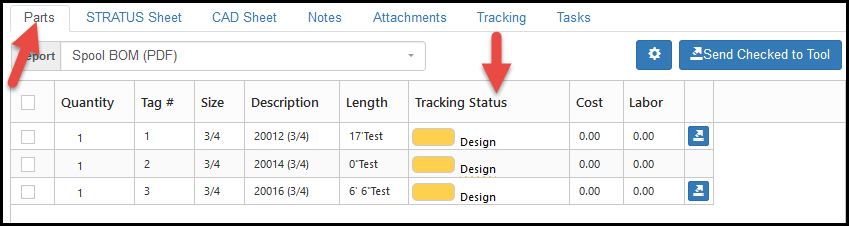
- The tracking status of parts in the assembly will be Design, the first tracking status in the list.
- The assembly tracking status will be Issued.
Auto Assemblies
- The Auto Assemblies or Continuous Spooling feature is included in the Model Viewer and Package Viewer under Actions > Assemblies. This feature enables users to start spooling by selecting one part and then through a series of clicks, tell STRATUS when the spool ends and where the next one begins.
- To use the Auto Assemblies feature, be sure the system you want to auto assemble is connected. Click the Selected Connected tool and then click a part in the system. If the connected system turns to blue (selected) then Auto Assemblies will work. If not, discuss the connection issue with the modeler.
- To use the Auto Assemblies tool in the Models Viewer or Package Viewer, go to Actions > Assemblies and click the Auto Assemblies button.
- Note: To start the Auto Assemblies process, you can either click a part first in the spool or the Auto Assemblies button.
- Click the 1st part in the spool. A unique Spool Start number will display.
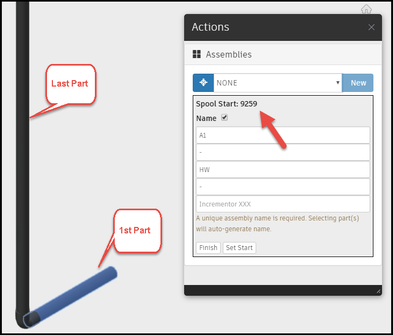
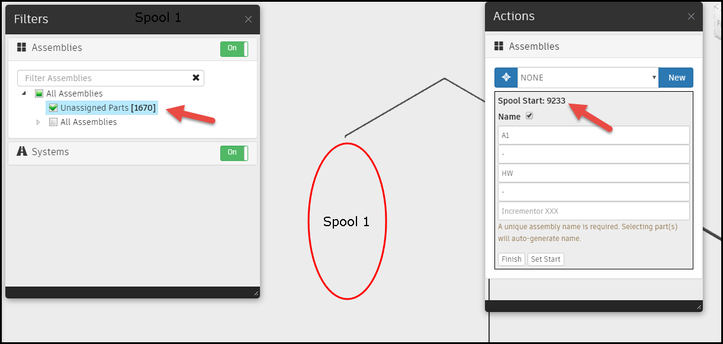
- Click the last part in the spool. If, you want a visual indication that the spool was created, under Filters > Assemblies, select the Unassigned Parts checkbox so that parts added to new spools will disappear (Ex. Spool 1). Notice that the Spool Start number has changed indicating that your next click will be the last part of the next spool.
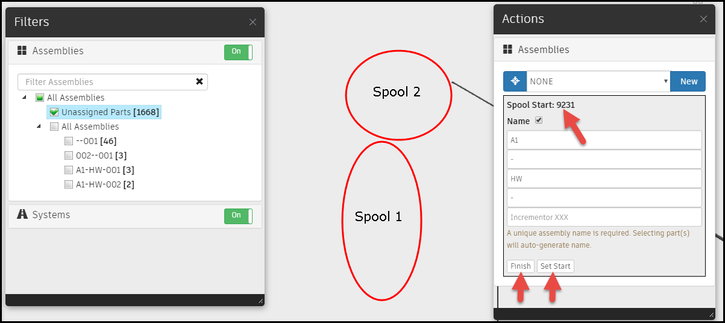
- Click the last part of the next spool. The spooled parts (Spool 2) may be filtered out and a new Spool Start number will display.
- Note: When clicking parts avoid selecting couplings and welds as STRATUS ignores these parts.
- The Assemblies > Dashboard is one place to see the newly created spools.
- Continue this process until you are done. Welds are automatically included.
- Set Start - The purpose of the Set Start button is to clear the spool start number and allows you to start spooling with a clean slate. You don’t have to use this button, but is can be useful when you start spooling a separate system.
- Finish - The purpose of the Finish button is to close out the continuous spool command. While the continuous spool command is active it watches the clicks and generates the assemblies.
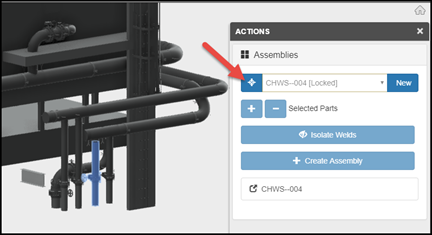
Clear Assembly Button
- Under Models > Actions > Assemblies, a button has been added to clear the assembly selector which will make it easier to select a spool and edit it.
- For example, when you select an assembly under Models > Actions > Assemblies, STRATUS thinks you want to add or remove parts from the assembly. But, let’s say you just want to clear the selected assembly.
- Now you can click the button next to the currently selected assembly.
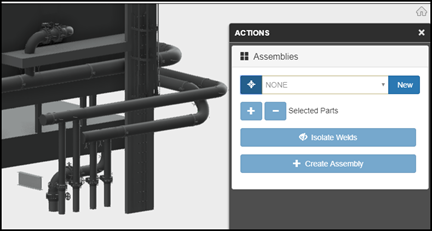
- The Assemblies panel will clear and be set to NONE.
Create Assembly in Revit
- Open a model in Revit.
- Select items to be included in a spool or assembly.
- Under Add-Ins > GTP STRATUS, click the Create Assembly button. The STRATUS Create Assembly dialog will display.
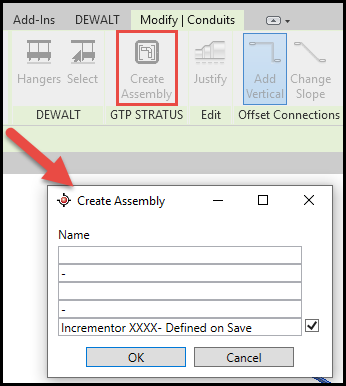
- Hover over a field to see which information should be entered. When assemblies are created within STRATUS, these fields are populated automatically.
- When done, click save and the assembly will be created.
- Once the model is published, the assembly will be visible in STRATUS.
Remove Item From Assembly when the Assembly is part of a Package
- If you have created a package
- And, the package includes an assembly of parts
- And then, you remove one or more parts from an assembly
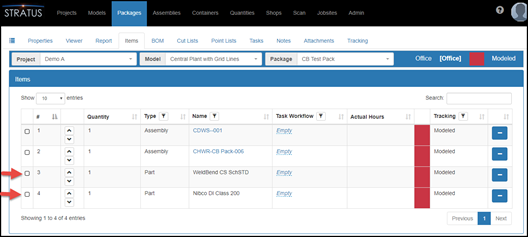
- The part will be listed as separate part in the package. Here’s an example where the 2 parts were removed from one of the above assemblies.
Move a Single Part to a Different Assembly
To move a single part from one assembly to another assembly:
- The target assembly and the assembly that contains the part being moved must be in a tracking status where Can Assemble is checked.
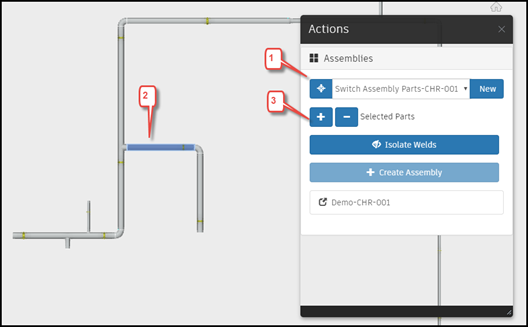
- Under Actions > Assemblies, select the target assembly.
- In the model, hover over the part that you want to move to a different assembly, press the Tab key, and the click the part. This should select the part, not the entire assembly.
- Click the Add Selected Parts to Assembly button.
- Click OK at the “Move Parts From One Assembly To Another?” prompt.
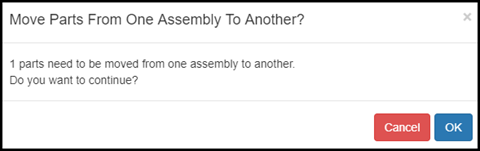
- The assembly and parts will be moved.
Can Package Unchecked
When parts have been added to a package, and the package's tracking status is set to one where Can Package unchecked (Ex. Issued below), it also means that parts within the package cannot be added to an Assembly. This is true even if the tracking status has Can Assemble checked. Can Package being unchecked means that no changes can be made to the package.
Unique Assembly Instances in Revit
A Shared Family parameter can be added to a parts family will force unique instances of assemblies in Revit. This is the same way Victaulic overcomes Revit’s feature that automatically creates multiple instances of a named assembly type. By including this shared parameter in Revit for pipe fittings, couplings, and welds for example, you can force separate assemblies when using STRATUS for Revit.
To use this feature:
- Open a model.
- Create Shared Parameter under Manage > Shared Parameters > New
- Name: Schedule Assembly Name
- Discipline: Common
- Type of Parameter: Text
- Double click and open a part.
- Click Modify > Family Types > New Parameter > Shared Parameter > select the Schedule Assembly Name created above.
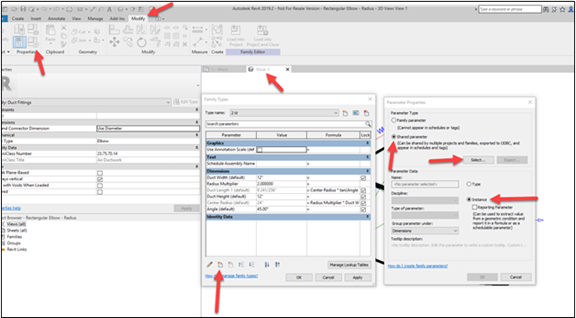
- Select Instance parameter.
- Save the family file.
- Go back to main model.
- Insert > Load Family > Family file just created.
- Next time a model is published using this shared parameter it will include unique instances of assemblies.
Related content
© Copyright 2022 GTP Services, LLC All rights reserved. | About | Contact